Sometimes there are very easy things to which I come throgh during my daily workload. However, I appreciate that not all the people may have the same skills and flexibility to perform a task.
As during the last few weeks I was reorganizing some Google Analytics account, I have had to provide an easy guide to add an account into an existing profile.
Because it’s such a common question, I decided to create this short post, which may be helpful for you as well.
Add an extra user into your Google Analytics Account
Quite obvious, I’ve to start in some way to tell you what to do ;-)
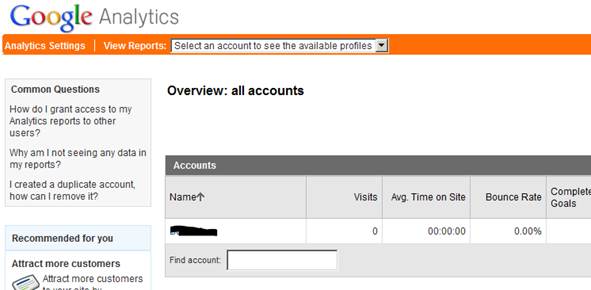 The number of the accounts that you can show in this panel depends from how many accounts you are connected to or you are managing.
In a normally scenario there is just one entry.
Select the account you wish to operate to enter into the Profiles area simply clicking on the link provided when your mouse pass over the name.
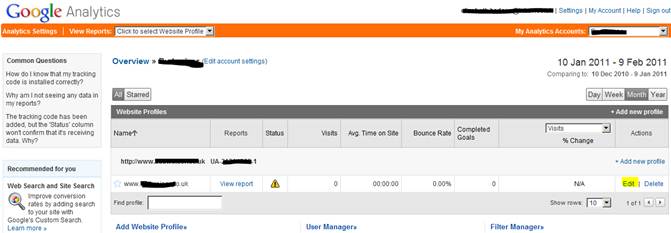 As per the Accounts panel, also the Profile area may contain more than entry. However, unless there has not been a particular reason to create additional profiles, you will find just one entry.
You have to decide which is the profile at which you would like to add the additional user, then click on the edit link at the right side of the screen to enter into the Profile settings.
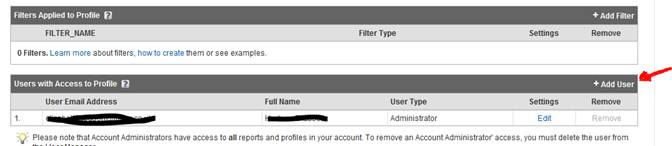
Scroll down at the bottom of the page until you find the “User with Access to Profile”, then click Add User on the right side.
 You will be proposed with the following screen.
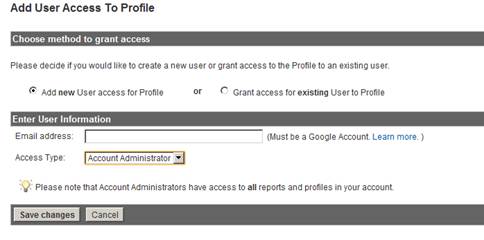 If you are configuring a brand new account, it is unlikely that other users exists or have been previously granted the access. Therefore you have to add the new user from scratch leaving the first option box - Add new user - as shown.
Because this procedure applies in case you have an existing user, in that circumstances you have to switch to the adjacent option. Of course the layout of the screen will change, but it won’t propose you anything you won’t be able to cope with. It’s a couple of click configuration.
Back to our procedure, you have to provide the email address of the person you want to add. Bear in mind the email address need to be a verified Google Account.
This does not mean that you can use only Gmail address, but that email address need to be associated to Google in order to use their services.
If you don’t have previously associated your account, do it before continuing.
Moving forward, you have to select the Access type. A user can be a standard User or an Administrator.
As you can imagine a User has pretty limited access, so they can only login and see the data available without changing anything. Therefore, if you think that your data are in a threat, think carefully what kind of grants are you assigning.